On this Page
Preflight and Package for Print and Output to PDF
Introduction
At some point during our workflow and design process we want to send something to the proof printer. Normally the best approach to this is to output to PDF from InDesign and then print from this file.
Ultimately we will need the high quality PDF to send to the printer. We will also need to ‘package’ the InDesign work and include in this package the ‘print ready’ PDF.
Preflight
We use preflight to check that there are no errors in the InDesign file(s). We want to make sure that:
- There are are no missing dependencies (fonts, images, linked texts)
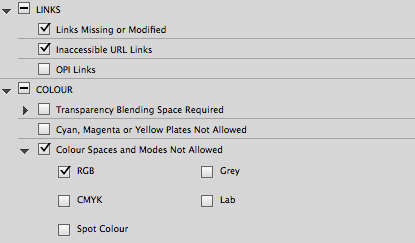
- All images are CMYK
- All images are at least 250dpi (ideally 300dpi) - DPI = dots per inch
- Images are not resized un-proportionally
- there are are no style overrides (we want to avoid this if possible)
Preflight profile and checks
Setting up a profile
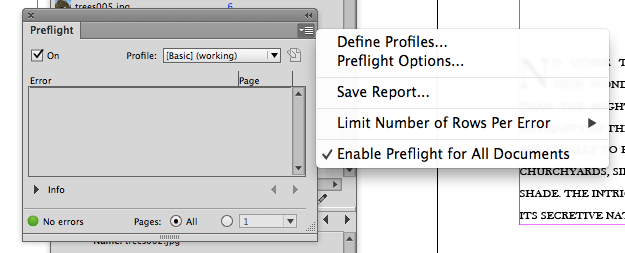
Go to Window/Output/Preflight to display the Preflight dialogue box.
Select Define Profiles from the context menu
On the left list of categories, you may see some existing profiles. You need to create a new one and open all the triangles that point to the right that have either a dash or a tick along side them. This opens the topic and reveals its contents:
Starting at the top we will go through the options and explain them.
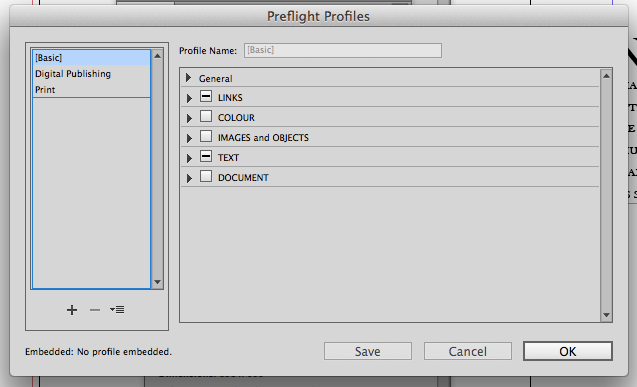
- Links
- We need to be sure that the InDesign document can find all linked files.
- Colour
- Colour spaces need to be in CMYK for print
- Images
- Resolution - we need at least 250dpi
- Non-proportional scaling - don’t distort images
- Text
- Overset text
- You may spot a red + sign bottom right of a text box.
- This indicates overset text.
- Font types not allowed
- Type scaling
- Minimum type size
Look through the digital profile and check you understand the selections relevant to this preflight check.
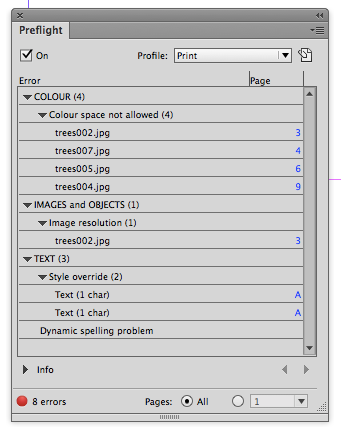
Using the preflight profile to check your file
- Display the Preflight panel (Select Window/Output/Preflight).
- Select the correct profile for checking this file. (Print)
- With the profile selected, InDesign displays any errors in the Info box of the Preflight panel.
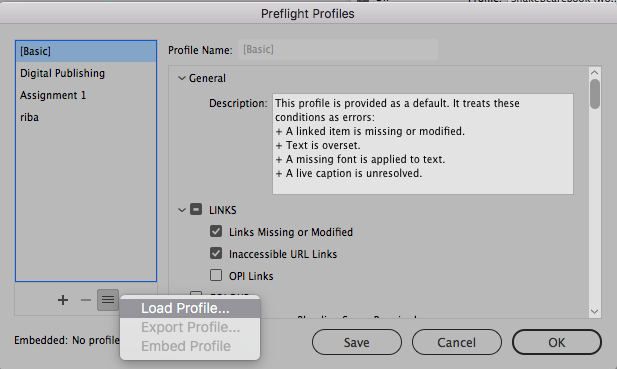
Note: You can download the configured Preflight Profile that I created for you here; once downloaded you can load into InDesign from the Preflight Panel > Define Profiles.
You should correct the errors and recheck the file.
Creating print ready PDFs
First make sure that there are no preflight errors.
In Indesign go to File>Export>PDF
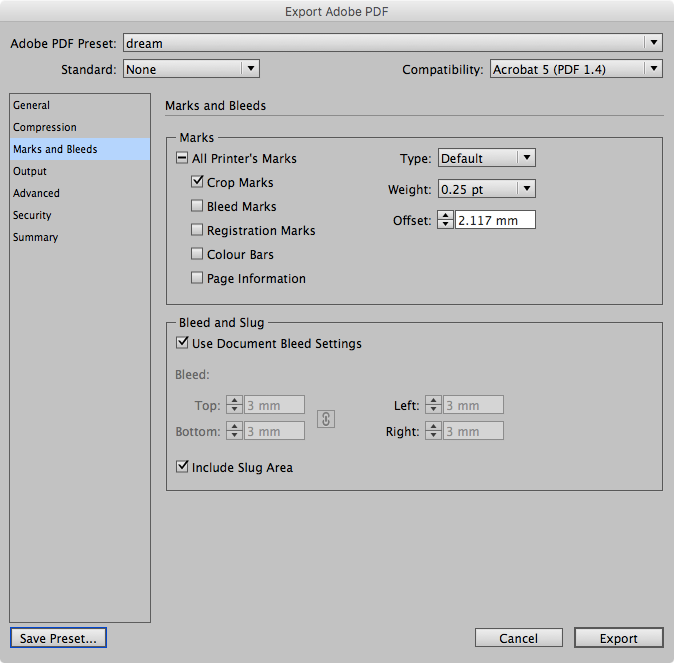
The PDF options
Make sure you have selected PDF for print and not interactive.
Under Marks and Bleeds, select crop marks and use the Document Bleed settings.
What is the slug?
If your PDF needs it, you might wish to add some notes outside the page but within the print area of the PDF. A slug can be added on any, or all sides of the page.
If you are working on the cover, you may want to add fold marks that align with the spine or even the flaps if your cover includes those. The fold marks must be within the slug but outside the document area.
Once you have the correct settings, use ‘Save Preset’ and give these settings a name.
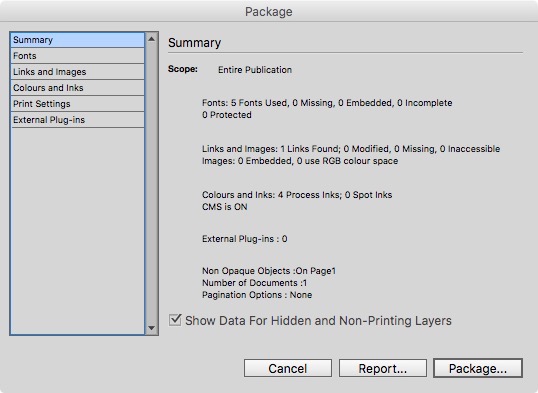
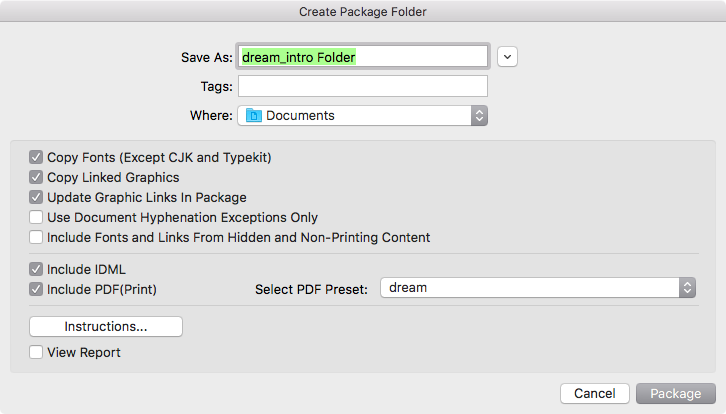
Creating the Package from InDesign
For your assignments you need to create a package from InDesign. This process creates a folder with all of the assets (linked files), fonts, and the print ready PDF with the created preset.
To create the package go to File>Package and go through the settings, making sure that you include the print ready PDF. This should be created from the preset that you previously saved.
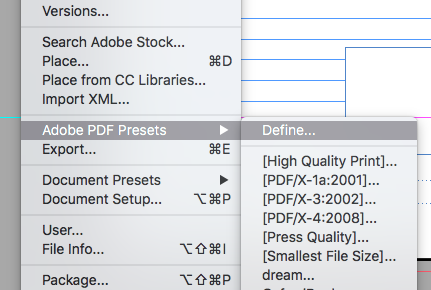
Note: You can create the Adobe PDF preset before you create the package, so that it is available when reach that point in the package creation dialogue. To create the Adobe PDF preset go to the File menu and find Adobe PDF presets > Define. Alternatively you can download the one I have created here.
Final Steps for creating the InDesign Package
When you create the package you will asked to add some information to an instructions.txt file
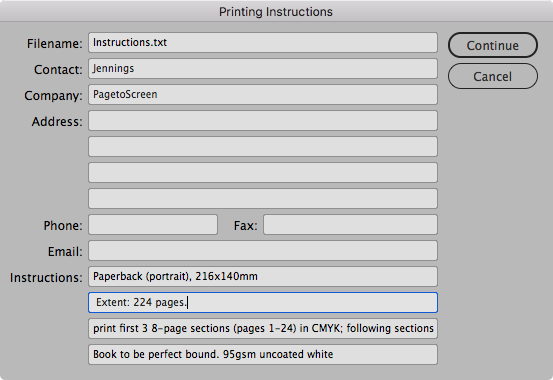
You should add your name to the appropriate field, and add the extent, size and colour in the blank fields at the bottom as in this image. You may need to edit this text file since this dialogue box is rather limited in space given. You will find the text file ‘instructions.txt’ (unless you renamed), in the package folder.
Note: It is important that you get an extent (number of pages) that is even and divisible by 16 or possibly 8 for this project. In a real project, the printer would advise about the working requirements; in other words, you would normally discuss this with the printer.
Don’t forget to count the total number of pages rather than just observe the page numbers.
Be very careful to count all pages from the half-title to the end. Add blanks if necessary but always end the InDesign file with a left (recto) page.
Creating the Package from an InDesign Book
If you are using the book panel to combine chapters then the package creation happens from the context menu of the book panel. You can only select ‘package Book for Print’ when you have no InDesign file selected within hte book panel itself.
Filed under: InDesign, Design and Production
This page last edited on: 2017-12-08