On this Page
Placing images - Anchoring and wrapping
We look at how to ‘place’ images on the page, and the issues that we might encounter along the way.
Images can be put on the InDesign pages in a a number of ways, but before we explore these methods, we need to prepare our workspace and the images that we intend to use.
Links
It is most likely that our images will be linked to the InDesign document, so it is important to be working within a certain folder structure and to have saved the InDesign document before we begin the process of adding the pictures.
Note: I do not recommend pasting images into InDesign, because when you use this method, the image will become embedded and it will be very difficult to edit the original unless you use a script to extract.
InDesign, maintains a link to the image files, and so we should try to build a folder structure that places the images below the parent InDesign file. This way, we can carry the parent folder to another location when required.
Image Formats
InDesign will accept graphic files in a number of formats (jpeg, png, TIF as well as native Photoshop images), but there are aspects of the image format which need understanding before we can proceed. In some ways, these qualities will depend on your final projected output; print, eBook or possibly both.
Resolution
The resolution of the images will have a significant effect on the output quality. Typically, images for print will need to be in a resolution of (at least), 300dpi (dots per inch) or 120dots per centimetre.
Colour
Images need to use the CMYK colour space when used for print. You can change RGB images to CMYK in Photoshop under the Image>Mode menu.
Placing Image
When you place an image into InDesign is is good practice to switch on the ‘Show Import Options’, in case you want to take limited layers from Photoshop images.

I advise placing images on the pasteboard first, so that you can make modifications before you place on the page.
Anchoring Images
One of the most important concepts in structured book publishing is document flow.
When you place an image on the page and move the text to accommodate that image, you are applying a context for that image. However, if you make changes (stylistic or editorial) to the content on pages before that image, then the context changes and the image will need to be moved.
Avoiding this is achieved by anchoring the image in it’s context.
Note: Anchoring images (and other objects) at the appropriate point in the text, is crucial when you intend to create a reflowable eBook from InDesign.
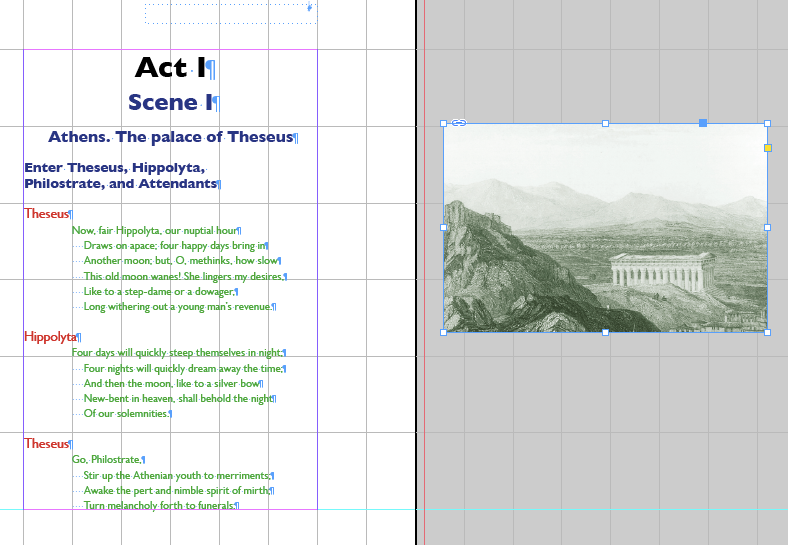
Once we decide where the image should go we can anchor the image (previously placed on the pasteboard), by dragging the little coloured square seen top right of the image frame.
Note: It is blue because the layer is coloured blue - it could be a different colour, if the layer is set to a different colour in the layers setting.
We need to drag this coloured square to the end of a paragraph. We cannot (or should not) anchor in the middle of a line or word.
Once we let go of the mouse we may find that the image jumps to an unexpected position. This because we need to set certain parameters for this anchored image, but just like paragraph and character styles we will also need to make an object style to fulfil the desired relationship to the text.
Anchored Object Options
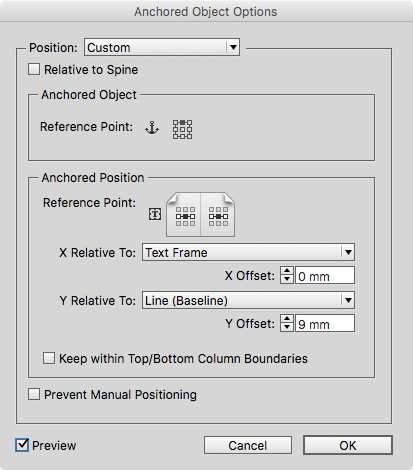
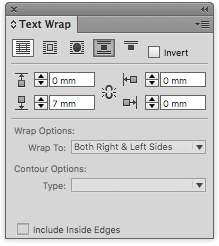
The position needs to be a custom one rather than inline and you will see in this image that the object has a top centre reference point and the position reference point is also centre. We can move the image into the desired place relative to the anchor point in the text, but we must also set up the text wrap options.
Object Styles
We can (and should) use Object Styles wherever possible, so that we can use seeing consistently throughout the publication. In the image here, you can see that the selected object uses an object style called scene_image because this example book design uses an image to illustrate where the scene takes place.
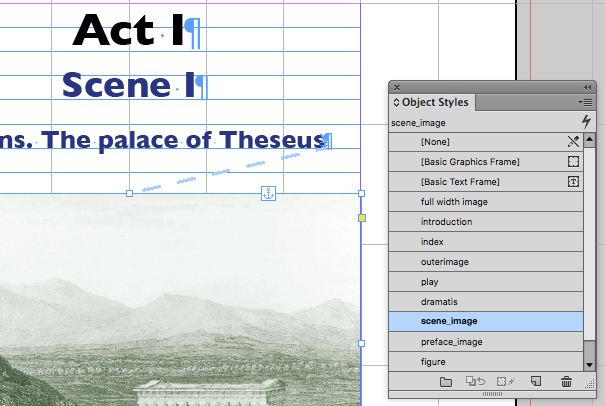
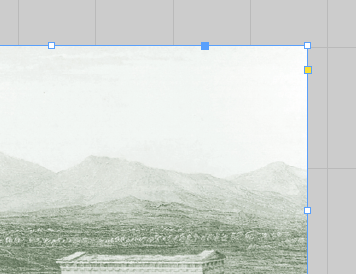
You may also notice that we can confirm that the image is anchored by the ‘anchor’ symbol that has now replaced the little blue square. Also, because we have ‘Show Text Threads’ the link between the image and the anchor point is indicated with a dashed line.
Perhaps we want a different style and placement for an image within the play; an image that has a shape and bleeds off the page.
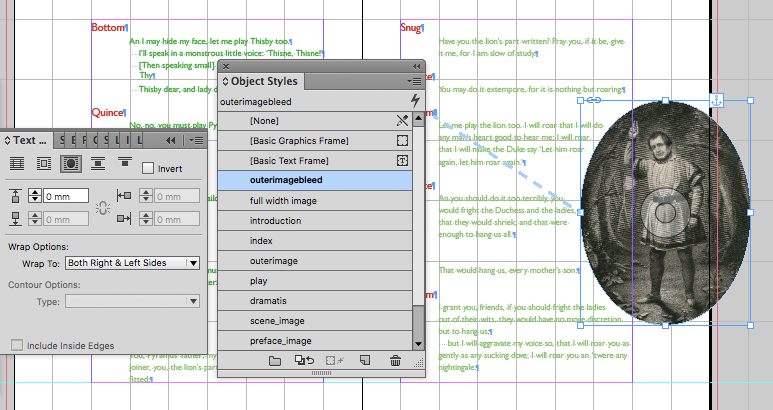
We can adjust the parameters and then create a style for this object. We can also make the position relative to the spine; a kind of mirror alignment.
Text wrap and Anchoring
There are some particular aspects of text wrap that are peculiar to objects that are anchored.
You will notice that the text wrap does not behave as you might expect above the anchor point in the text. For this reason you must only expect to wrap below the anchor point. If you have encountered this issue, then you will need to release the object from anchoring and then re-anchor above the text that you wish to wrap around the image.
Anchoring across Page spreads
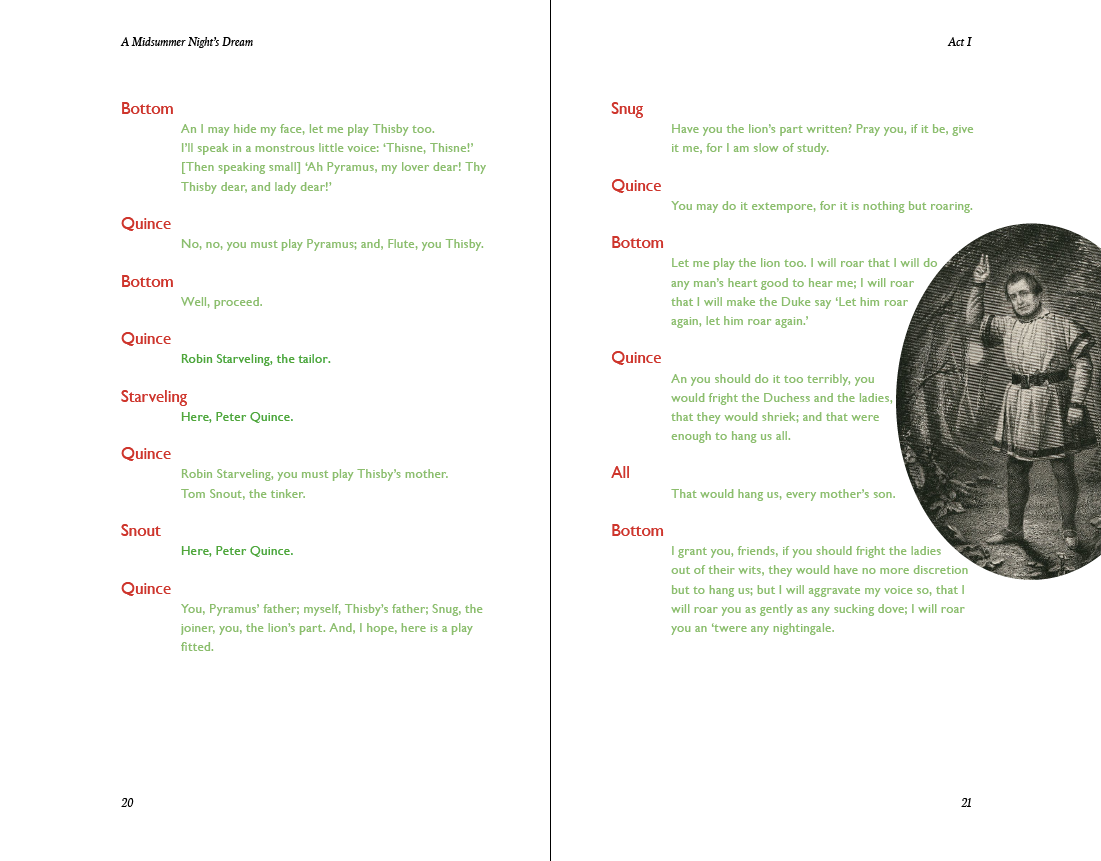
If you have a design that requires an image opposite the text then you may need to anchor at the beginning of the line opposite. The image here shows an example.
Note: It is not possible to anchor an image in this way unless your pages are arranged as spreads. You cannot anchor to another page that is not part of the spread.

Filed under: InDesign, Design and Production
This page last edited on: 2017-05-17